MXM FX EQ N manual
Source code on GitHub · Questions on Discord
This manual explains how to work the graph of MXM FX EQ N, then goes through its cards. What every MXM editor shares, such as presets, zoom, themes and the keys, is in Using the MXM editors.

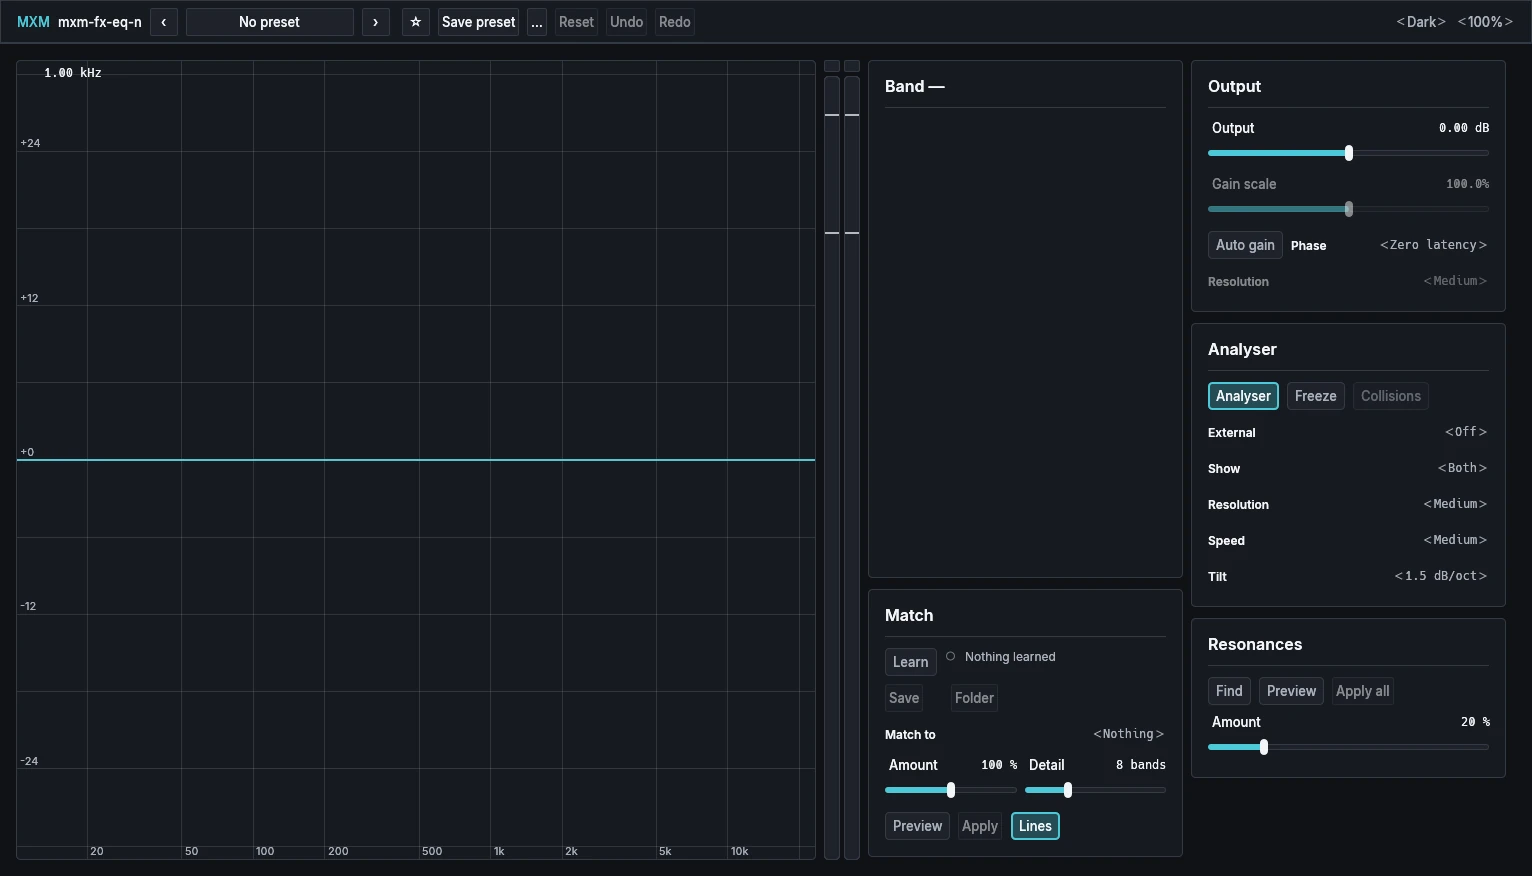
The editor doesn’t put its cards on pages. The graph takes all the spare room. Beside it stand two output meters, then two columns of cards: Band and Match, then Output, Analyser and Resonances. In a window too narrow for all of it, the whole surface scrolls sideways.
The meters show the left and right output after the Output level, so they read what leaves the plugin. A clip at 0 dBFS lights until you click it.
App bar
Besides the shared preset row, Theme and Scale, the app bar has three buttons. Undo takes back the last change to the bands and Redo puts it back, as do Ctrl+Z, Ctrl+Shift+Z and Ctrl+Y (Cmd on a Mac). The history keeps 256 changes, from the graph, the keys and the cards, and survives closing the editor. Loading a preset or the host restoring a project clears it.
Reset makes the EQ as new: every band removed, every control at its start, and everything Match learned, matched to and applied deleted. Unlike Init, it is one undoable step, though Undo brings back only the bands. Saved references stay.
The graph
Frequency runs from 10 Hz to 30 kHz across, gain ±30 dB up the side. Behind the curve, the analyser draws the input as an outline and the output as a fill, from 0 dB at the top to −96 dB at the foot. A line at the top reads the selected band’s values.
To make and shape bands with the mouse:
- Click the curve where you want a band. A bell appears there at 0 dB and Q 1.00, in the lowest free slot, so the sound doesn’t change until you drag it. Press on the curve and drag to make a band and move it in one go. With all 24 slots in use, nothing is added.
- Drag a point: sideways for frequency, up and down for gain. Hold Shift for a tenth of the speed. Escape during a drag puts the band back.
- Turn the mouse wheel over the selected point to change its Q, or over any point with Alt held.
- Right-click a point for the eight shapes, then Copy, Cut, Paste, Invert gain and Delete. Right-click the background for Paste and Select all.
- Hold Ctrl (Cmd on a Mac) on a point to solo its band while you hold it.
Each band is a point carrying its slot number, drawn at its own gain; a shape without gain sits on the 0 dB line. The selected point has a ring, and a bypassed one is hollow. Only the combined curve is drawn.
To work on several bands, Shift-click points, or drag a rectangle on the background (Shift adds to the selection). Ctrl+A selects all; Ctrl+C, Ctrl+X and Ctrl+V copy, cut and paste. An edit to the band on the Band card then moves the whole group, frequency and Q by one ratio and gain by one offset, as one undo step. The clipboard is shared by every MXM FX EQ N in the same host process, so bands paste onto another track, into free slots, never over a band. Clicking the empty background deselects.

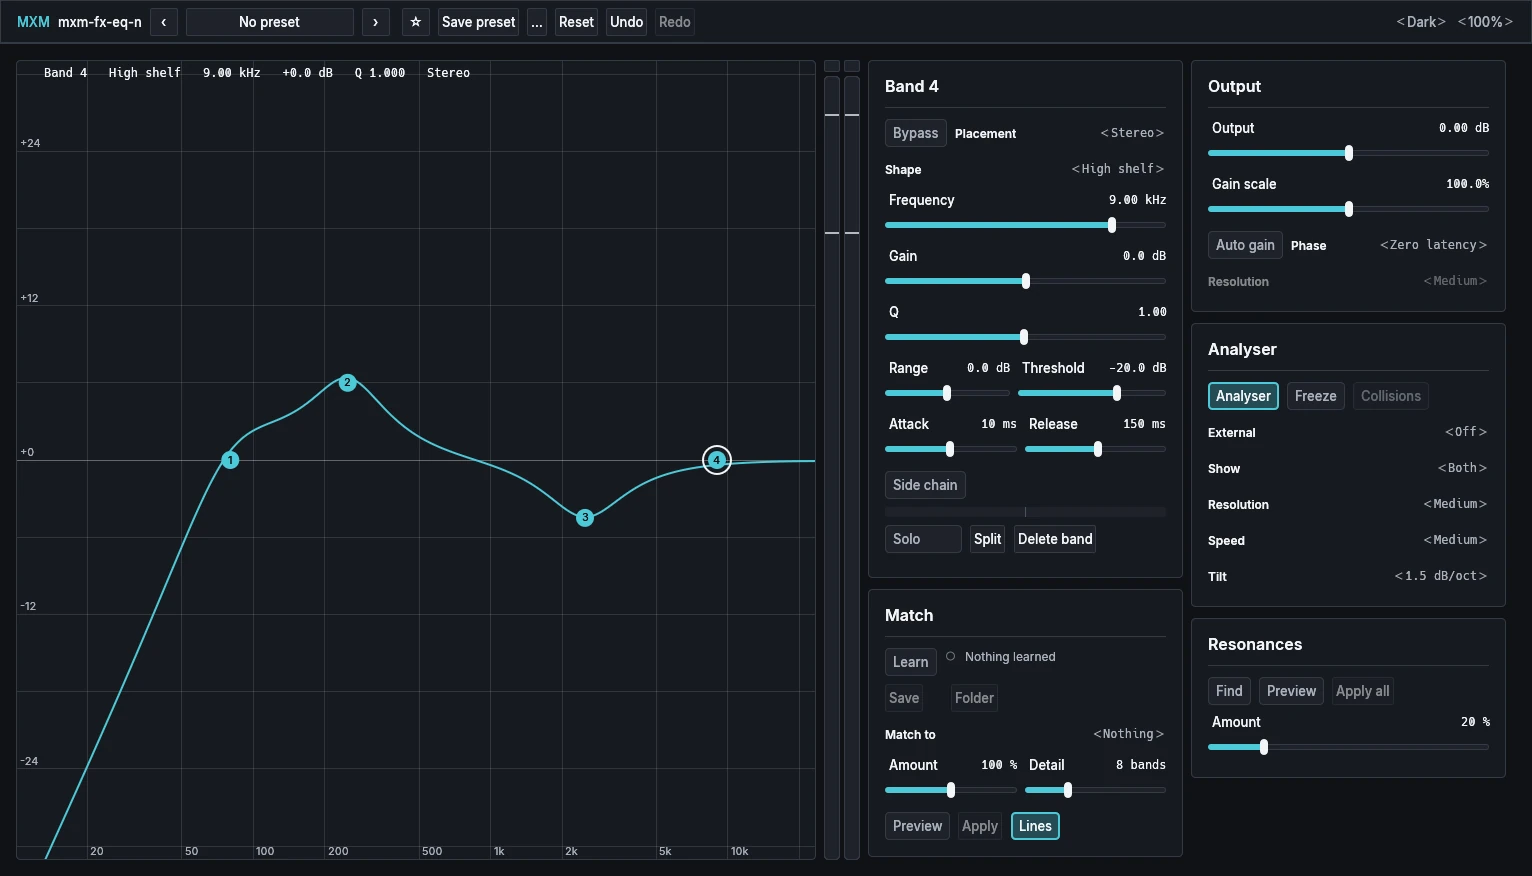
Where the channels differ, the graph draws and letters each one: L and R, and M and S dashed. In Linear phase the curve drawn is the one you hear.
Keys on the graph
Shift or C with an arrow moves the keyboard cursor between the graph and the cards. On the graph:
| Key | What it does |
|---|---|
| ← → | Select the next band down or up; with none there, move a semitone along the line |
| S with ← → | Move along the line an octave at a time |
| A with ← → | Move the band a semitone (with S an octave, with F a cent) |
| A with ↑ ↓ | Move its gain 0.5 dB (with S 3 dB, with F 0.1 dB) |
| E with ↑ ↓ | Change its gain |
| X with ← → | Narrower or wider |
| F with ← → | Take its lower or upper edge, for A to move alone |
| W with an arrow | Copy it into the lowest free slot |
| V | Make a 0 dB bell at the cursor |
| Shift+V, Delete, Backspace | Remove the band |
| Tab | Keep the gesture as one undo step |
| Escape | Take the gesture back |
Band
| Control | Range | Init |
|---|---|---|
| Bypass | Off, On | Off |
| Placement | Stereo, Left, Right, Mid, Side | Stereo |
| Shape | Bell, Low shelf, High shelf, Low cut, High cut, Notch, Band pass, Tilt shelf | Off (a new band is a Bell) |
| Frequency | 10.0 Hz to 30.00 kHz | 1.00 kHz (a new band: where you made it) |
| Gain | −30.0 dB to +30.0 dB | 0.0 dB |
| Q | 0.025 to 40.0 | 1.00 |
| Slope | 6, 12, 18, 24, 36, 48, 72, 96 dB/oct | 12 dB/oct |
| Range | −30.0 dB to +30.0 dB | 0.0 dB |
| Threshold | −60.0 dB to 0.0 dB | −20.0 dB |
| Attack | 0.5 ms to 200 ms | 10 ms |
| Release | 10 ms to 2.00 s | 150 ms |
| Side chain | Off, On | Off |
| Solo | Off, On | Off |
| Split | Button | |
| Delete band | Button |
The card shows the selected band and its number. With none selected it is empty. With several, the title lists them and an edit moves them all.
Bypass takes the band out of the sound and keeps its settings. Placement is where it works: both channels, the left or right alone, or the middle or the sides of the stereo image. A Mid or Side cut also moves the image a little near its frequency. On a mono track there is no Placement.
Shape changes what the band does and keeps its frequency, gain and Q. Frequency is the centre of a bell, notch or band pass, the midpoint of a shelf, the corner of a cut and the pivot of a tilt. Gain appears for bells, shelves and tilts; a tilt lifts one end by Gain and lowers the other. Q is how narrow the band is: on a shelf or cut, 0.707 is flat and higher adds a bump. Tilts and 6 dB cuts have none. Slope, for cuts, is how steeply they fall.
Range, Threshold, Attack and Release make a bell or shelf dynamic. At a Range of 0 dB the band stays as drawn; below zero it cuts further when the sound gets loud, above zero it lifts. Above Threshold, through a soft knee, the gain moves at 3:1 for a cut or 1:1.5 for a lift, never past Range. Side chain makes the band follow the side-chain input, heard through its own filter. The meter under it shows how far the band is moving, cutting left of the middle and lifting right.
Solo plays only what the band works on until you press it again: a band pass for a bell or notch, the region a shelf changes, what a cut removes. It is an audition, never saved or automated, heard only with the editor open, and it ends when you select another band or load a preset. Tilts have no Solo.
Split makes a left and a right copy of a Stereo band; Alt-click for a middle and a sides copy. Delete band removes it.
Match
| Control | Range | Init |
|---|---|---|
| Learn | Off, On | Off |
| Save | Button | |
| Folder | Button | |
| Match to | Nothing, other tracks with this EQ, saved references | Nothing |
| Amount | 0 % to 200 % | 100 % |
| Detail | 1 band to 24 bands | 8 bands |
| Preview | Off, On | Off |
| Apply | Button | |
| Lines | Off, On | On |
Match makes one track sound more like another:
- On the track to copy from, turn Learn on, play thirty seconds or more, and turn it off. The lamp is green while it hears sound. To use what it learned in other projects, type a name and Save it as a reference.
- On the track to change, learn it the same way, then pick the first track or a reference in Match to. The proposal appears as a dashed curve with hollow diamonds.
- Set Amount, how much of the difference to take, and Detail, the most bands it may propose. Preview plays the proposal as if applied.
- Apply makes the bands in one undoable step, replacing those the last Apply made.
Folder shows where references are kept, to rename or delete them. Lines shows or hides the learned and proposed lines. Learn needs the analyser on. What Match learns is saved with the project, never in a preset. Only tracks whose EQ runs in the same host process are listed, so a track hosted on its own in Bitwig is not.
Output
| Control | Range | Init |
|---|---|---|
| Output | −24.00 dB to +24.00 dB | 0.00 dB |
| Gain scale | 0.0 % to 200.0 % | 100.0 % |
| Auto gain | Off, On | Off |
| Phase | Zero latency, Linear phase | Zero latency |
| Resolution | Low, Medium, High | Medium |
Output is the level after every band. Gain scale scales the gain of every bell, shelf and tilt together; cuts, notches and band passes stay as drawn. Auto gain holds the loudness as you equalise, so switching the EQ off compares the curve, not the level. Its make-up is estimated from the curve, never measured.
Phase on Zero latency keeps the sound on time, its phase turning near each band as an analogue EQ’s does. Linear phase turns no phase, so a steep cut keeps a hit’s shape, but a narrow low cut rings before the note as well as after. A change is heard once the host restarts the EQ, which most do at once. Resolution sets how finely Linear phase follows narrow bands, and the delay: at 48 kHz about 48 ms on Low, 91 ms on Medium and 176 ms on High. A mix plays it on time, but monitoring live through it is late. Phase and Resolution can’t be automated.
Analyser
| Control | Range | Init |
|---|---|---|
| Analyser | Off, On | On |
| Freeze | Off, On | Off |
| Collisions | Off, On | Off |
| External | Off, Side chain, other tracks with this EQ | Off |
| Show | Pre, Post, Both | Both |
| Resolution | Low, Medium, High | Medium |
| Speed | Slow, Medium, Fast | Medium |
| Tilt | 0, 1.5, 3, 4.5 dB/oct | 1.5 dB/oct |
Analyser shows the spectrum; Find, Match and Freeze need it on. Show picks the input, the output or both. Resolution sets how finely the lows are drawn; High is enough to tell a room mode’s width. Speed is how fast a fallen level comes down. Tilt leans the display about 1 kHz so typical music reads level.
Freeze holds the highest levels of the last two seconds and marks the peaks. Drag a peak up or down to make a bell there, as wide as the peak. With no band selected, ← → walk the peaks and V makes a bell on one.

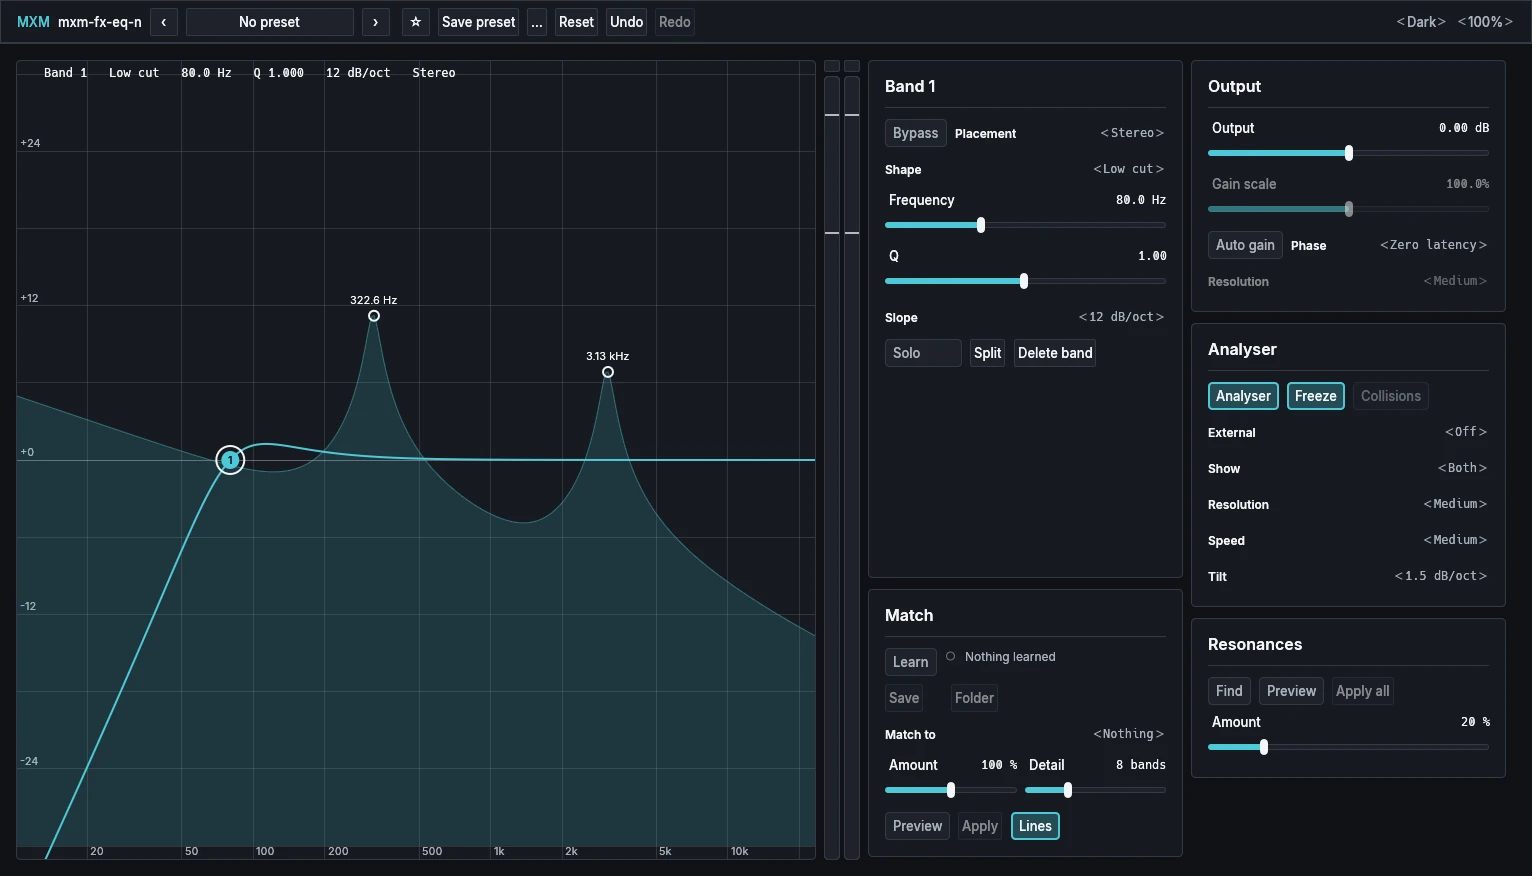
External draws one other spectrum as a dashed line: the side chain’s, or another track’s MXM FX EQ N output. Collisions then hatches the foot of the graph where the other may mask this track. It is an indication, not a measurement: listen before cutting. These settings are saved with the project, never in a preset.
Resonances
| Control | Range | Init |
|---|---|---|
| Find | Off, On | Off |
| Preview | Off, On | Off |
| Apply all | Button | |
| Amount | 0 % to 100 % | 20 % |
Turn Find on and play. It learns peaks that stay put while the notes move and proposes a cut for each, drawn as labelled triangles. Turn it off to keep what it learned. Below about 200 Hz a fast bass line can look like a resonance. Amount is how deep each cut is. Preview plays the cuts as if applied, and Apply all makes them bands in one undoable step. Click a single proposal to make just that band, or drag it to set its depth as you make it. Find, Match and Freeze end one another, so one set of proposals shows at a time.